Search This Blog

Saturday, March 6, 2010

The style of Twin Trunk called SOKAN


Easy to care for bonsai trees at BBNY


Free Shipping


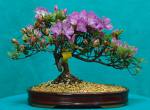
Hi, would you like to grow a twin-trunk style bonsai tree? Really, really cool. Well, in this blog I will explain how to do that. The twin-trunk style is a popular arrangement of two bonsai trees. When two seeds germinate near each other they naturally graft into one joined at the base. They are two plants that grow and combine by natural grafting and combine at the base. They are very, very intriguing. There are two ways of growing a twin trunk tree and that is to plant two or more trees very closely together or start a plant that has two or more trunks together already. If there are more than two trunks then you need to remove the other trunks. You will need to make a decision as to which trunks to remove depending on the shape and the position of the trunks on the tree. Just select the pair of trunks that looks most balanced in appearance to you. Recommended Indoor Bonsai Trees

Now the easiest way to start is to purchase a twin-stemmed plant from a nursery and make it into a bonsai. But if you have two trees to work with then tie the trees tightly together at the base with raffia or grafting tape, that way they will graft together as they grow. It's best not to tie with wire because it has no flexibility and the union can be ugly. Be sure to check the union regularly during the early process to see that it is going according to plan. Make sure you use two plants that are of the same species or variety. You want the color and leaf shape to be the same. Also, make sure the two trunks are different sizes. One should be taller and thicker than the other. It will give it a more interesting look. Ok, now when thinking about the viewing the angle of this style you need to consider arranging the smaller trunk alongside the main trunk and slightly to the rear or to the front. This will give it a much better appearance.

Here are steps to create your twin trunk bonsai.

1. Remove the tree from its pot and rake away the surface soil so that the base of the trunk and roots show. Cut out excess lower shoots so a clear tree image is formed.

2. So that the desired shape shows, you need to clear away excess internal shoots and minor branches.

3. Once you prune and style, the finished tree is completed.

The best tools needed are:

Rake
Branch cutters
Scissors
Pot
Mesh
Wire cutters
Pliers
Wire
Soil
Scoop
Chopsticks

Click here
One of a Kind Bonsai Trees
                                                                             1-800-FLOWERS.COM


These can be bought at bonai tree stores such as Bonsai Boy of NY Check the bonsai stores on this blog and you will find that you will have everything you need to grow a bonsai tree or purchase one that is already started and instructions on how to maintain it. Click here

Friday, January 8, 2010

Bonsai Technique Sharimiki


Recommended Indoor Bonsai Trees

      In my previous post I discussed how to create jin on a bonsai branch. In this post I will discuss how to create sharimiki or shari  which complements jin. Sharimiki is created by stripping bark off part of the trunk. Natural sharimiki is when a tree may have been struck by lightning and part of the bark has been removed. The type of trees this is commonly seen on is junipers and pines. The basic tools needed to create sharimiki are electricians pliers and a gardening knife, however bonsai specialist tools will make the job easier. Bonsai Tools & Wire 

     As like creating jin the best time to creat sharimiki is in the summer when the flow of sap is greatest which makes it easier to strip the bark from the trunk of the tree. Be careful not to strip too much off the trunk as the tree depends on its bark to survive. When creating sharimiki keep in mind that you are working towards making it look natural so think about how it would look in nature such as how lightning strikes a trunk of a tree and which direction a branch would have fallen. Also you can study trees in nature that have gone through trauma. Relate what you have observed when creating sharimiki. When the sharamiki is complete you will need to wait for the exposed heartwood to dry and then treat the areas with a lime/sulpher solution to bleach and preserve the exposed wood. The color will be yellow at first, fade to white and then to a natural gray. For books on bonsai Click here

     To begin creating sharimiki you need to mark the position on the trunk with a pen. The next step is to cut into the bark to the heartwood and peel back the bark from the trunk using the tip of the knife. You want to create the sharimiki so it will link to the jin or jins (bark striped off the branch). You will see hair-like fibers on the surface of the heartwood - you can burn these off with a small flame. Once the sharimiki and jin are complete the tree appears much more aged or mature. The effect you want, so pat your self on the back.

Bonsai Boy

Friday, January 1, 2010

Creating Jin in Bonsai

United Kingdom Directory


   Creating jin is the art of  removing bark from a branch of a bonsai tree. The purpose is to give it an aged look. In nature you may see a dead branch of a tree that has been exposed to wind, rain, and bleached by the sun which eventually turns the barkless branch to a white-silvery color. This is the effect you want to create on your bonsai tree branch or branches. In nature jins are often seen on oaks, conifer, junipers and pines. Jin does not appear often on deciduous trees. (trees that lose their leaves seasonally)

     To creat a jin on a conifer, leave a stump several inches long when pruning a branch so it can be converted into a jin. Summer is the best time to do this because the sap moves the most during this season and makes it easier to remove the bark. Once you have made the jin let it dry in the sun and then apply a coat of lime/sulphur to bleach and preserve the wood. Reapply once or twice a year in the summer, doing this maintains the weather resistance of the jin. You can use a fine sandpaper to smooth and carve to refine it. This will help give it a more natural look. It's important to make sure the jin is in proportion with the other branches that have foliage.

     To start the jin, pick a branch you want to create the jin on. Remove all the foliage on the branch using branch cutters and scissors. Bonsai Tools & Wire Start at the base of the branch with a sharp knife and cut through the bark. The cut must go all around and through to the heartwood. Take the tip of the knife and cut into the bark through the heartwood from the trunk to the branch tip. Using jin pliers squeeze and twist the bark from the heartwood. Remove all the bark from the branch.  Once this is done you will see how the jin is taking shape and has a natural occurring look. To give a more natural and ragged look you can split and tear back the branch using branch cutters and pliers. Bonsai Tools & Wire It only takes a few minutes to create a weathered, natural looking jin using simple tools and it's your creative work!
                              

Free Shipping


Saturday, November 21, 2009

Wiring a Bonsai Tree


Wiring a bonsai tree is a technique used to give it a specific shape and style. You can bend and change the position of the branches by wrapping bonsai wire around them. You can position the branches to fill in spaces or wire in a downward or horizontal position to give a more mature look. It will take several weeks or a few months for the branches to stay in that position. The type of wire is important because the type of metal in the wire can be poisonous to the tree so you would need to find out what type of wire to use with the specific species of tree you have. The two basic types of wire used are copper and aluminum. Aluminum wire is easier to use for the beginner. Check with a bonsai store or an online bonsai store. Bonsai Tools & Wire

There are different thicknesses of wire available for bonsai trees. It takes 3 to 4 different thicknesses of wire to start with. Reels of wire are available in 1mm, 1 1/2mm, 2 1/2, 4mm, and goes up to 8mm. When you wire the branch or trunk the wire needs to be 1/3rd the thickness. Bonsai Tools & Wire

Most bonsai trees can be wired any time of the year. You don't want the wire to cut into the branch while it is growing so you need to check it often especially during growing season.

To start wiring you can cut the right length of wire which should be a little longer than what you need or you can wire straight from the reel. Start wrapping the wire around the base of the trunk working your way up at a 45 degree angle to a branch and wrap at the same degree angle along the branch. Wrap the trunk and primary branches first and then the secondary branches. Once you are finished wiring you can slowly and carefully bend the branches. Be careful not to break and do not change the position once you have it in place. 


When you are finished, fertilize Fertilizers and place in a proper place such as the shade. Keep an eye on the tree and remove the wire when it is time. You will need to use wire cutters Bonsai Tools & Wire

It's not good to unwind the wire. It is easier to remove by cutting the wire at every turn.

Click here for books on bonsai.


Bonsai Boy of New York


Wednesday, November 11, 2009

Styling Bonsai

Bookmark This Site

When starting your own bonsai you will want to style the bonsai to fit the type of tree you are growing. It helps to observe how trees grow in nature since that will help you design a real looking miniature tree. You will also want to choose a pot that will complement the tree.Bonsai Pots   For example, pots that have sharp corners and straight sides are usually used for formally-shaped plants whereas round or oval pots are for informal designs.
You also want to consider the pot finish,color,and size. Generally deciduous trees (refers to trees that lose their leaves seasonally) are grown in glazed pots and evergreen (are plants that have leaves all year) grown in unglazed pots.Bonsai Pots

There are many different styles of bonsai. I am going to mention five common and popular styles. Bonsai Pots


The first style I want to talk about is the formal upright style (Chokkan). In this style the tree is upright, straight with a tapering trunk. The branches are broadest at the bottem and taper to the shortest at the top. This is the bonsai above.


The next style is informal upright style (Moyogi). The top of the tree is always directly above the trunk at the soil line. The trunk is irregular shape and the branches are similar to the formal upright except that the shape of the irregular trunk may break the progression of the branches by causing them to be uniquely obscure or prominent.


The third style is slant style (Shakan). The trunk of this bonsai is basically straight but is slanted.


The fourth is the cascade style (Kengai). These bonsai are made to look like trees that grow on the sides of mountains or over water.


Semi cascade style (Han Kengai) bonsai sticks out over or/and beneath the edge of the pot.


To style your formal upright tree you need to see where the main roots start by removing the surface soil. Cut away old leaves and leaves growing at the bottom of the branches.Look at your tree and decide which side you want to be the front. The front is when the branches and roots are not sticking out towards you. To shape your bonsai choose the branches you would like to use in the design. The purpose is to make it look like a real miniature tree. You want gaps between the foliage. The first branch should be about 1/3rd of the way up the trunk to the left or right. The other branches should be a little above the ones below and sticking out in different directions but not directly opposite or at the same level. Remove the branches you don't want. The desired shape of the tree is triangular but doesn't have to be perfect in that shape. You will want to trim your branches so they are longer at the bottom and tapper shorter at the top.

Have fun!

Books about bonsai. Click here. Bonsai Tools Bonsai Tools & Wire

I hope the information in this blog helped you. Thanks for visiting.

Wednesday, October 28, 2009

For the Beginner Bonsai Enthusiast

Bonsai Tools & WireBonsai ; WireTrees Under $30Click here
Bonsai Boy


SEO Company India

If you are thinking of growing your first bonsai tree and you don't know were to start or what kind of tree to begin with here is some advice to help you make your decision. You can check with a nursery in your area for information about the best species to start with and also advise you on how to grow and care for as well as train your bonsai. It takes time and patience. There are many types of bonsai so do some research and learn about the different types of bonsai trees. There are indoor bonsais and  outdoor bonsais. Different bonsai trees have different needs and it is crucial that you know what these needs are conserning the type of tree you want to start with. Some popular bonsai trees and the best trees for bonsai are Juniper, Japanese Red Maple, Pine, Azalea (I love), Chinese Elm, Ficus, and there are more but these are a few.

You can learn through reading books on bonsai  and through nurseries and searching through the internet.Click here Basically how it works is that you wait for it to grow, trim, cut, wait for the tree to grow, cut the roots, pinch off growth and so forth and also use wire to train the tree to grow in the style you want.  It's your own piece of art work like your own creation as far as how the tree looks as it is growing because you are training it to grow in the shape you want it to. It's important that you understand that the style should fit the type of bonsai tree you have. The type of care is specific to the type of bonsai tree. Also keep in mind that you have to deal with potential diseases that you can't avoid but deal with by consulting with the experts which is of course the nurseries. They know what to do as they have so many plants to keep healthy and disease free so use them for their expertise. Do not try to style a bonsai tree if it is sick. Nurse it back to health first and then style it. Make sure you find a nursery that specializes in bonsai trees. They can show you how to wire and prune, fertilize, water, and so forth.

You can start your first bonsai tree from seeds but it can take over a year before you can begin pruning. It would be easier to purchase a starter bonsai from a nursery or from an online bonsai site . That way you can start your indoor or outdoor bonsai now. The best starter bonsai to start with is Tropical or subtropical trees. These include Semi-tropical Sea Grape which have large leaves but can be cut down to look good, Japanese Red Maple which are hardy, and Chinese Elm which are sturdy and can adjust to different styles of bonsai.
It is important that you consider the temperature and light when you place your bonsai. The bonsai tree needs morning sun and shade in the heat of the day. Some will take full sun and others won't. It just depends on the type of tree you have.
Other important factors to consider are soil, fertilizer, Pruning.
For soil you want to make sure that you have right type of soil for your bonsai. The pH balance needs differ for different trees.Bonsai Soils
You need to make sure that the bonsai fertilizer is right for your tree.Click here for fertilizer It needs to be water soluble. You should apply the bonsai fertilizer one or two times a month- Follow according to the growing season. The soil should be loose and wet.
Now here's the art of bonsai, pruning, prune the branches at the start of spring. Leave the branches you want to keep and make sure you leave enough branches so the tree can live. If the roots are bound to the inside of the pot then cut the roots. It's better to use pruning tools especially for bonsai trees because they are designed specifically for that purpose and it makes pruning easier. Bonsai Tools & Wire